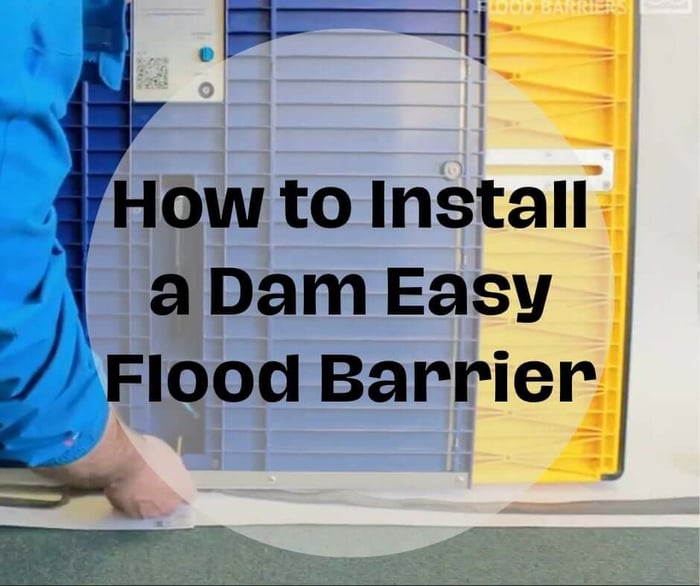
Flood protection doesn’t have to be complicated or stressful. With Dam Easy Flood Barriers, you get a product designed to be installed quickly and efficiently – even if you’re not a professional contractor. In this guide, we’ll take you through each step of the installation process, explain why each step is important, and show you how proper installation can make all the difference in protecting your home or business from flood damage.
Why Proper Installation Matters
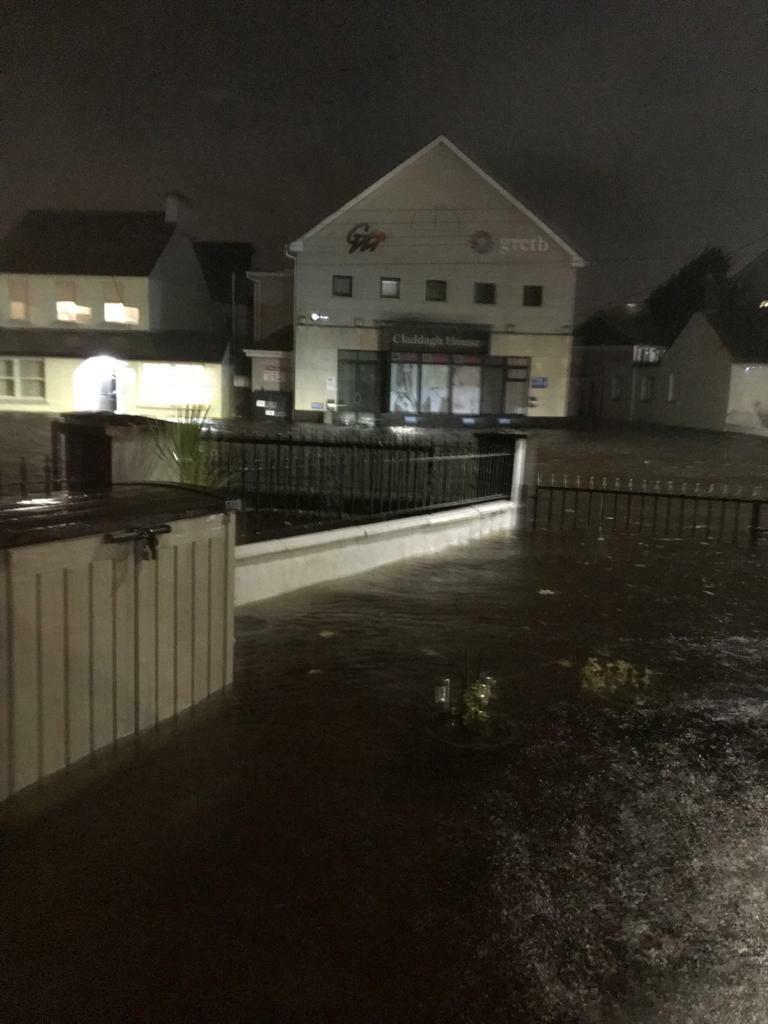
Before we dive into the installation steps, let’s talk about why proper installation is so important. Flood barriers aren’t just pieces of plastic; they’re your first line of defense against water damage. When installed correctly:
Leakage Prevention: The barrier forms a watertight seal that keeps water where it belongs. A gap or misalignment can lead to leaks, which could mean costly repairs later.
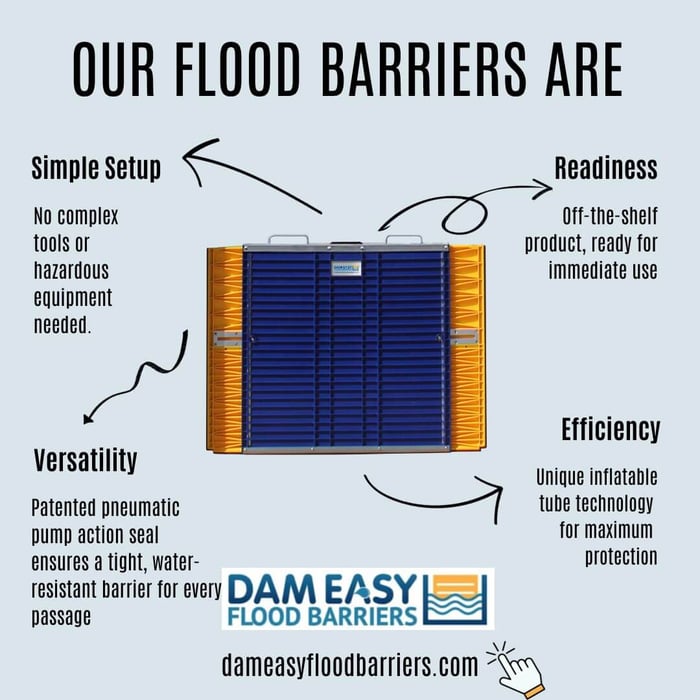
Easy to Use: Dam Easy Flood Barriers are designed to be lightweight and user-friendly. You don’t need advanced skills or fancy tools. With the right approach, almost anyone can do it.
Long-Term Savings: By preventing water from entering your property, you’re not only protecting your investment but also saving money in the long run. Flood damage repairs can add up quickly, so a proper installation is a smart economic move.
Enhanced Safety: A securely installed barrier reduces the risk of water damage and the subsequent hazards that may arise from it, making your property safer for everyone.
Taking the time to understand and carefully execute each step during installation will ensure that your barrier performs as expected during a flood.
Step-by-Step Installation Process
The installation process is laid out clearly in the product’s instructions. Follow these steps carefully, and you’ll have your flood barrier up in no time.
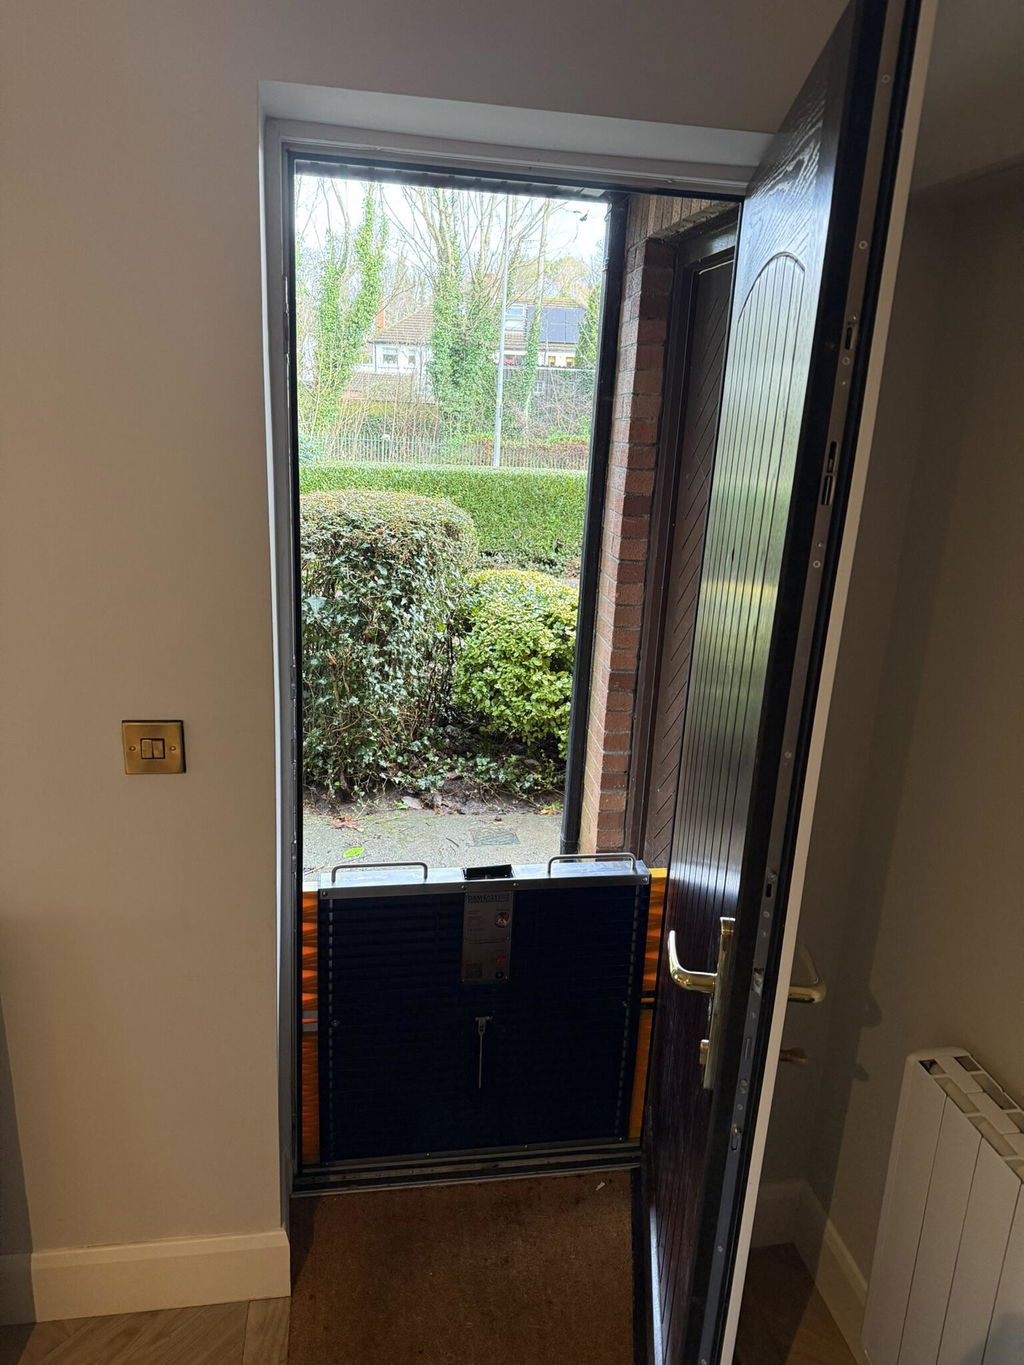
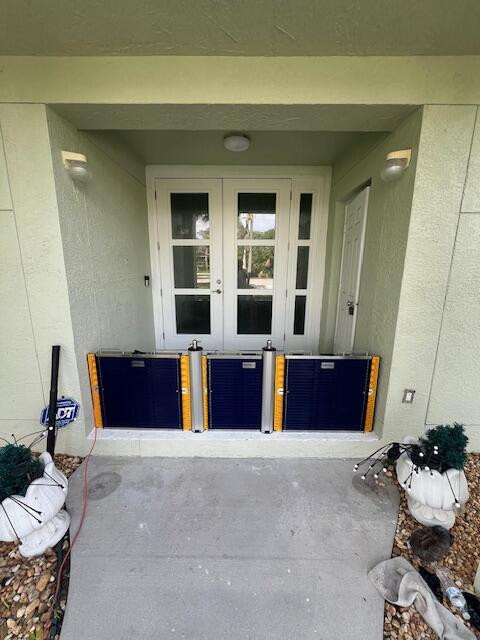
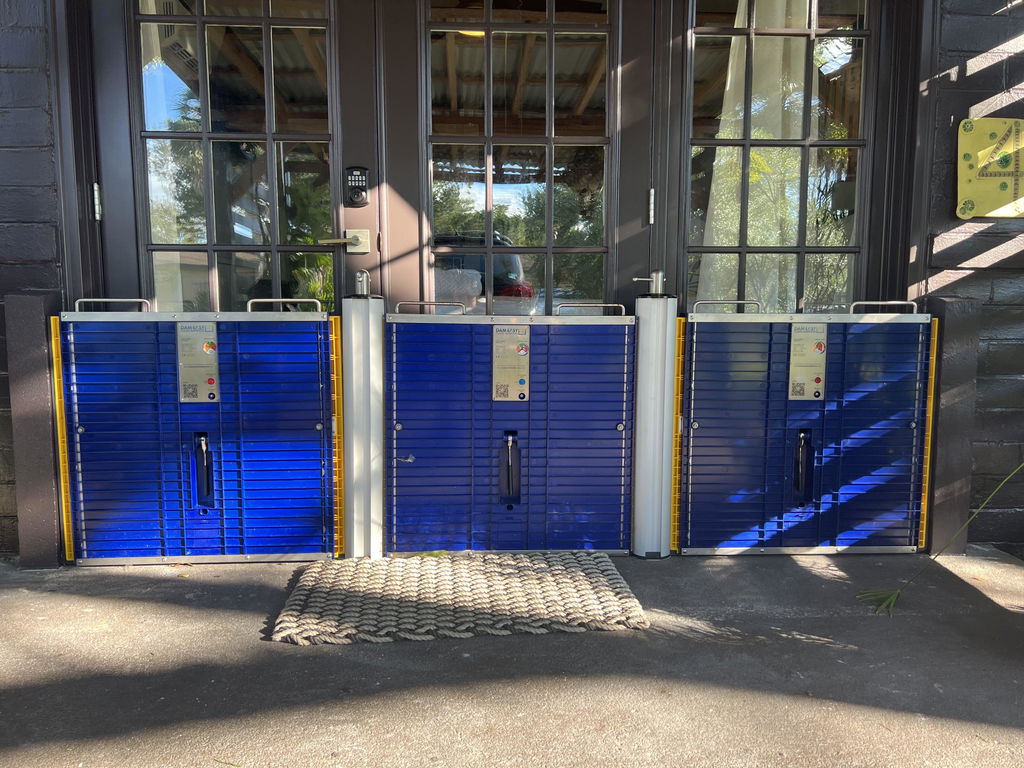
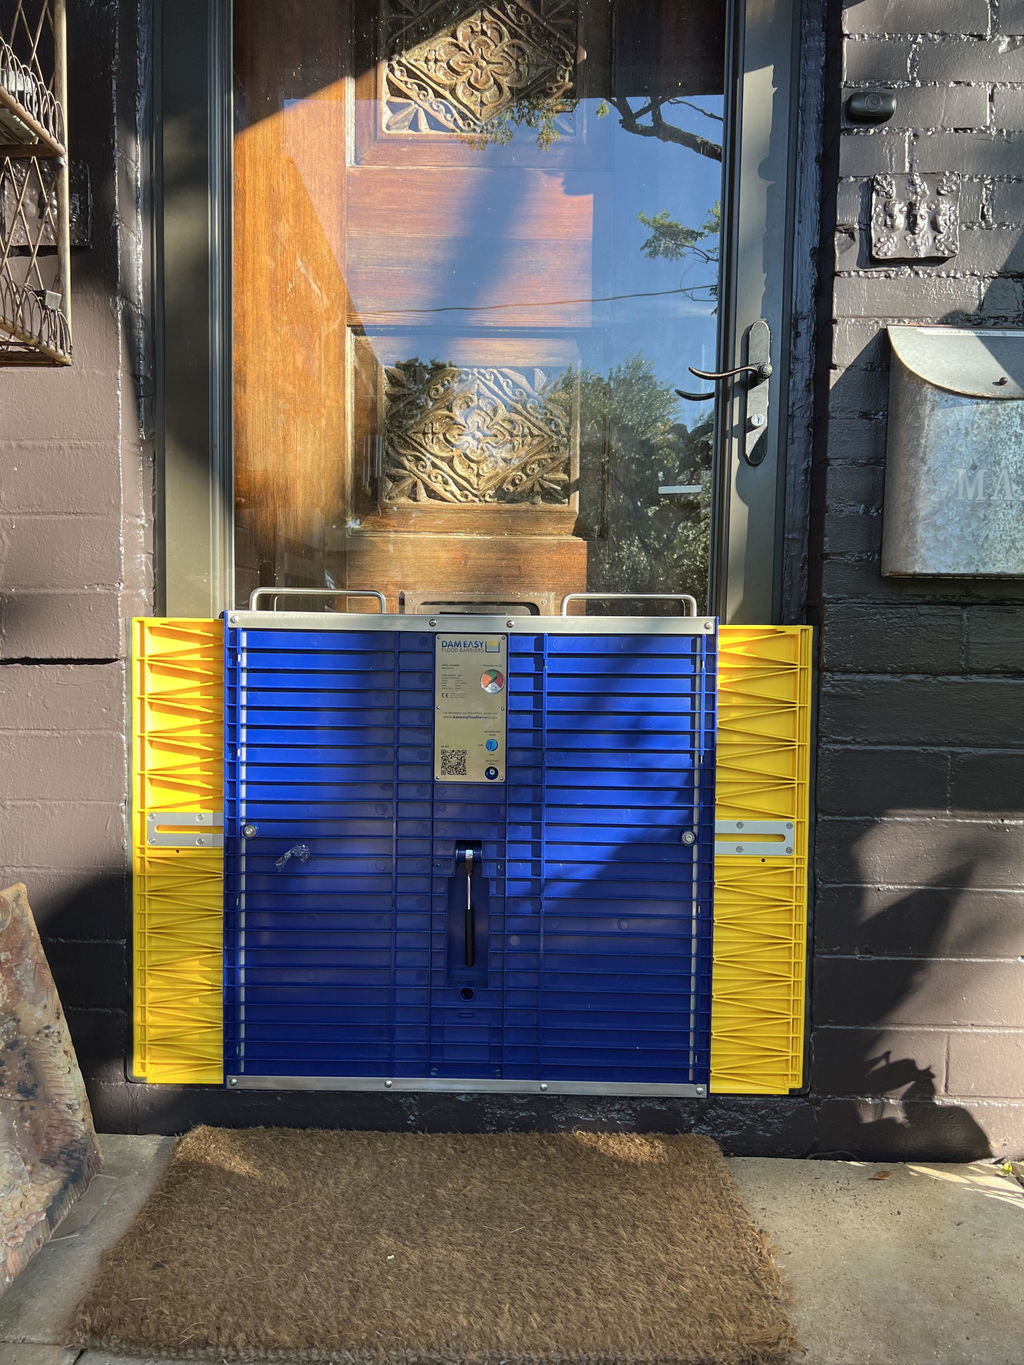
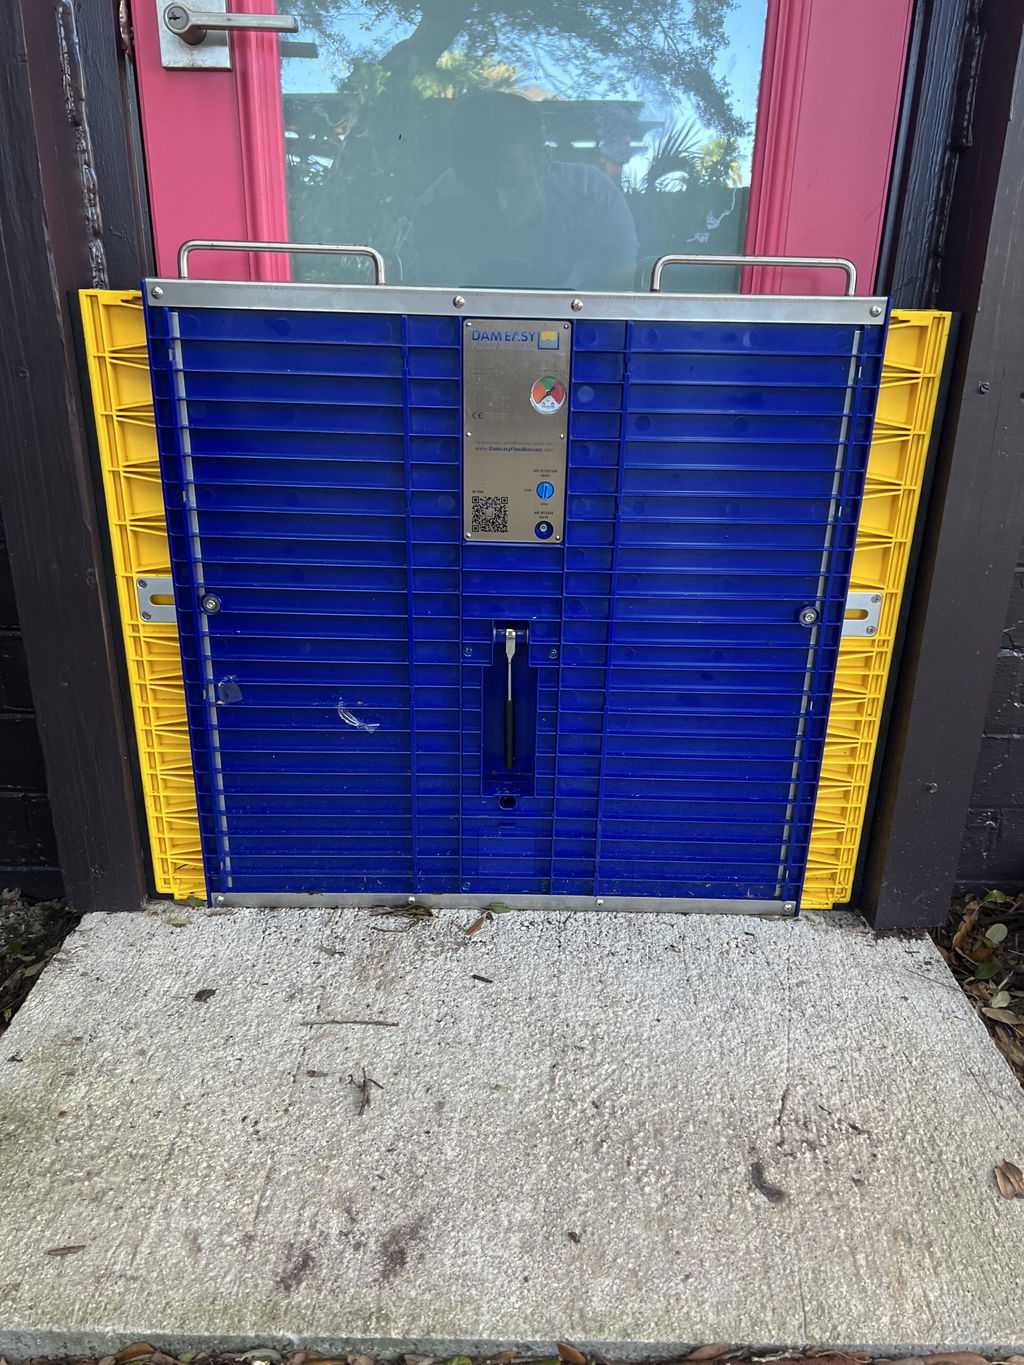
1. Positioning the Dam Easy Flood Barrier
Start with a Clean, Clear Space:
Clear the Area: Begin by removing any dirt, debris, or objects from the doorstep and the surrounding reveals. A clean surface is critical because even small particles can prevent the barrier from sealing properly.
Place Fillers: Once the area is clear, position any filler materials at each corner of the doorstep in line with where the barrier will be placed. This step provides a stable base and helps prevent gaps.
Set Up the Barrier:
Center Positioning: Position the flood barrier vertically between the reveals of the doorway. Make sure the barrier is centered, and the ratchet handle is facing inward. This is important because the handle is your tool for extending the side panels later.
Check Alignment: Take a moment to make sure that the barrier is perfectly aligned with the doorway. Proper alignment ensures that once extended, the barrier will form a tight seal with the reveals.
By starting with a clean and stable surface and aligning the barrier correctly, you set the stage for a secure installation that won’t let any water sneak through.
Ultimate Flood Barrier

$1,299.00
Floods are becoming more common around the world. What was once a 100-year phenomenon is now a seasonal trend that homeowners must deal with. That’s EXACTLY why you need this Dam Easy Ultimate Flood Barrier! An excellent alternative to heavy… Read More
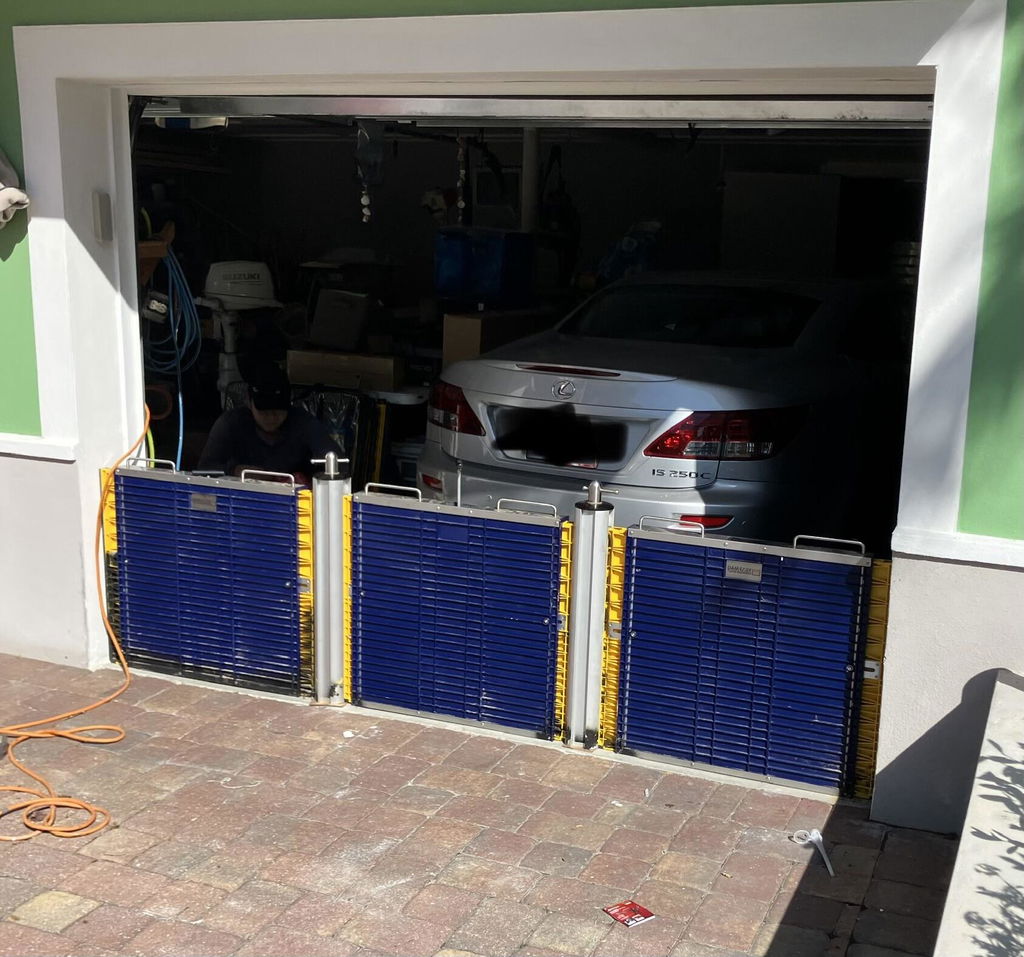
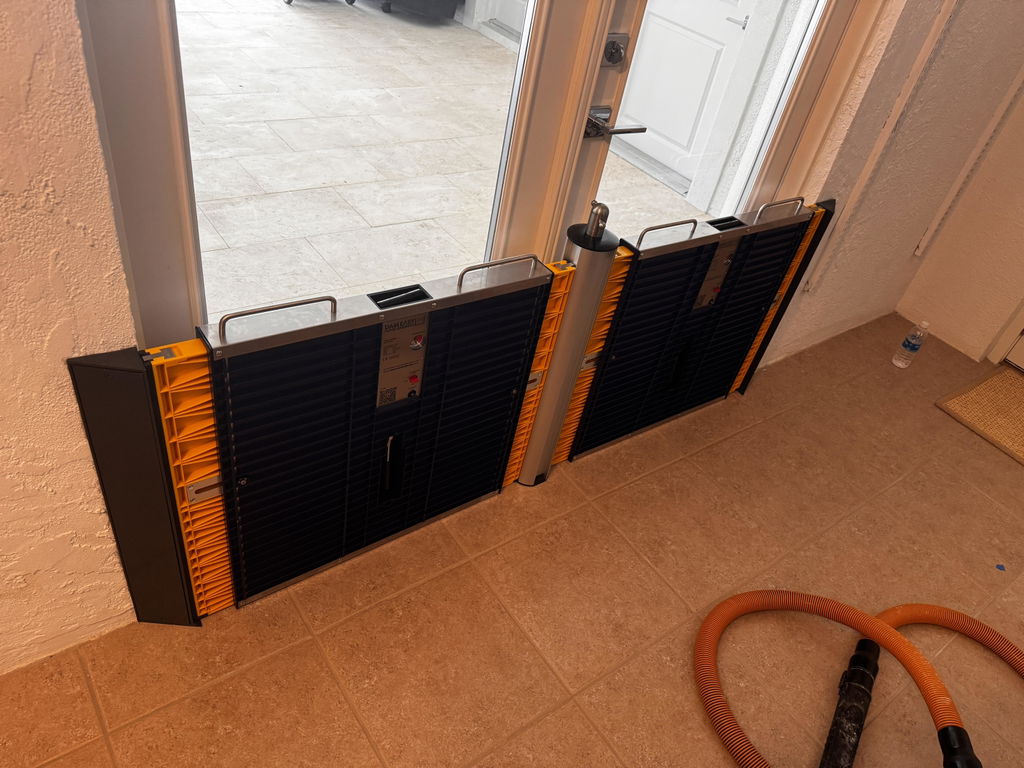
2. Extending the Side Panels
Prepare for the Next Step:
Wear Gloves: Flood barrier installation involves areas where your fingers could get pinched. It’s a good idea to wear gloves to protect yourself. This is more important than you might think, especially when handling the ratchet mechanism.
Extend the Panels:
Hold Firmly: Firmly hold the barrier in place while you press down at the designated lifting point. This ensures that the barrier remains stable as you work on it.
Use the Ratchet Handle: Jack up the ratchet handle. This handle is designed to extend the side panels gradually. Continue extending them until you feel that the barrier is secure inside the reveals.
Listen for the Resistance: You’ll know you’ve extended the panels enough when you encounter resistance on the ratchet handle. At that point, check that the barrier is not moving within the reveals. It should feel snug, with no unwanted wiggle.
Key Points to Remember:
‘Max’ Extension Mark: Look for the ‘Max’ extension mark on the top of each side panel. This mark is your guide to ensure that you do not extend the panels too far. Overextending can compromise the seal and might interfere with the door’s ability to close.
Ensure a Tight Seal: After extending the side panels, make sure that the door closes without any interference. This is a good final check to confirm that you’ve hit the optimal extension point.
Extending the side panels correctly is crucial because it is this process that forms the barrier’s sturdy connection with your property. Taking your time during this stage will pay off during heavy rains and floods.
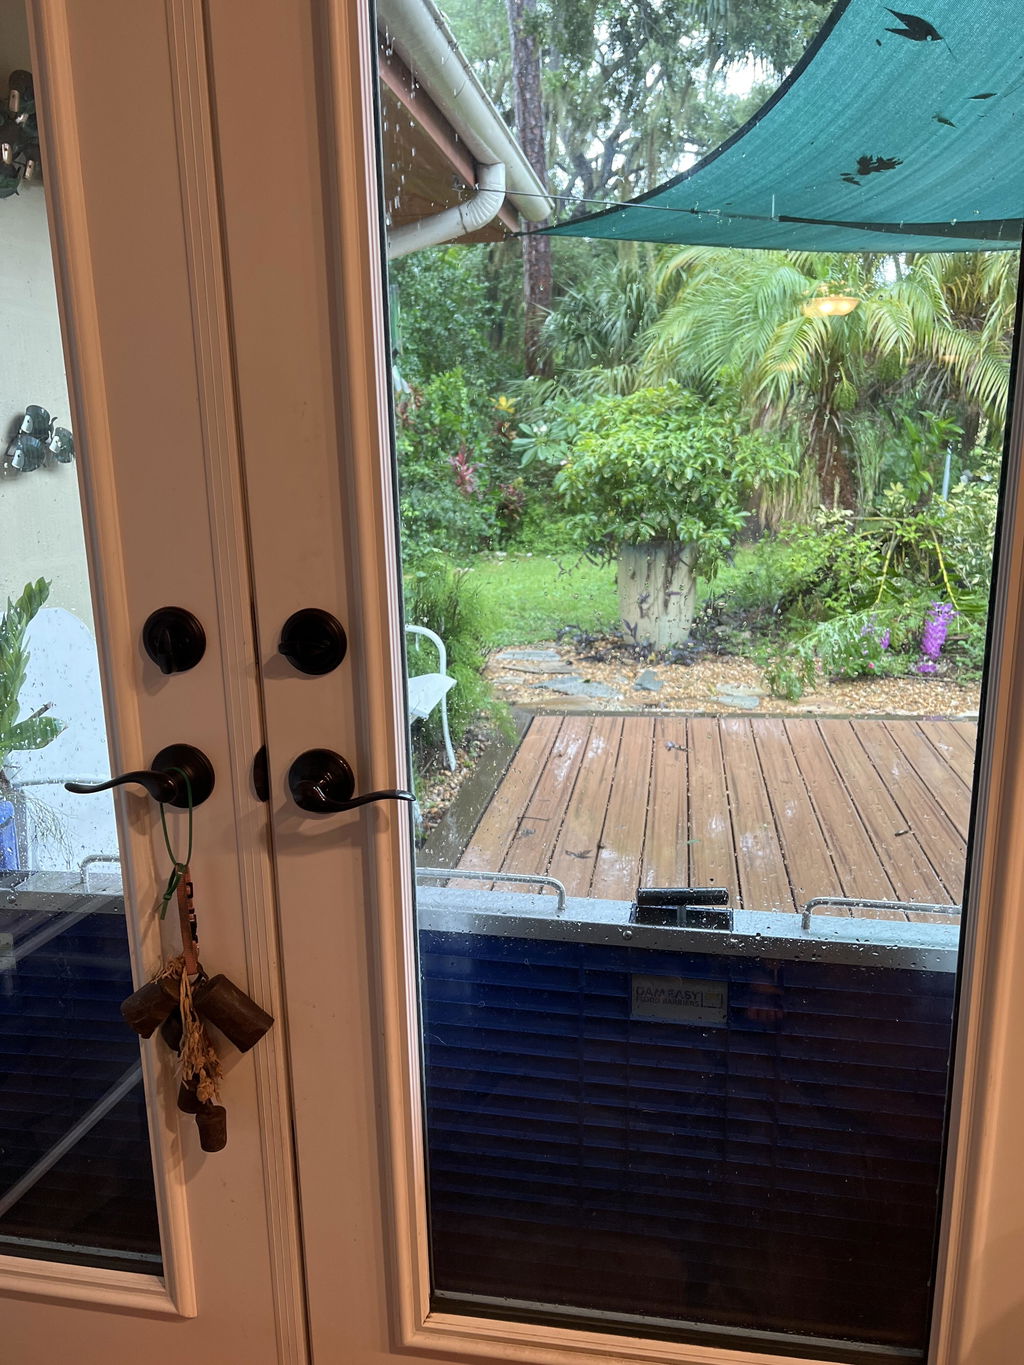
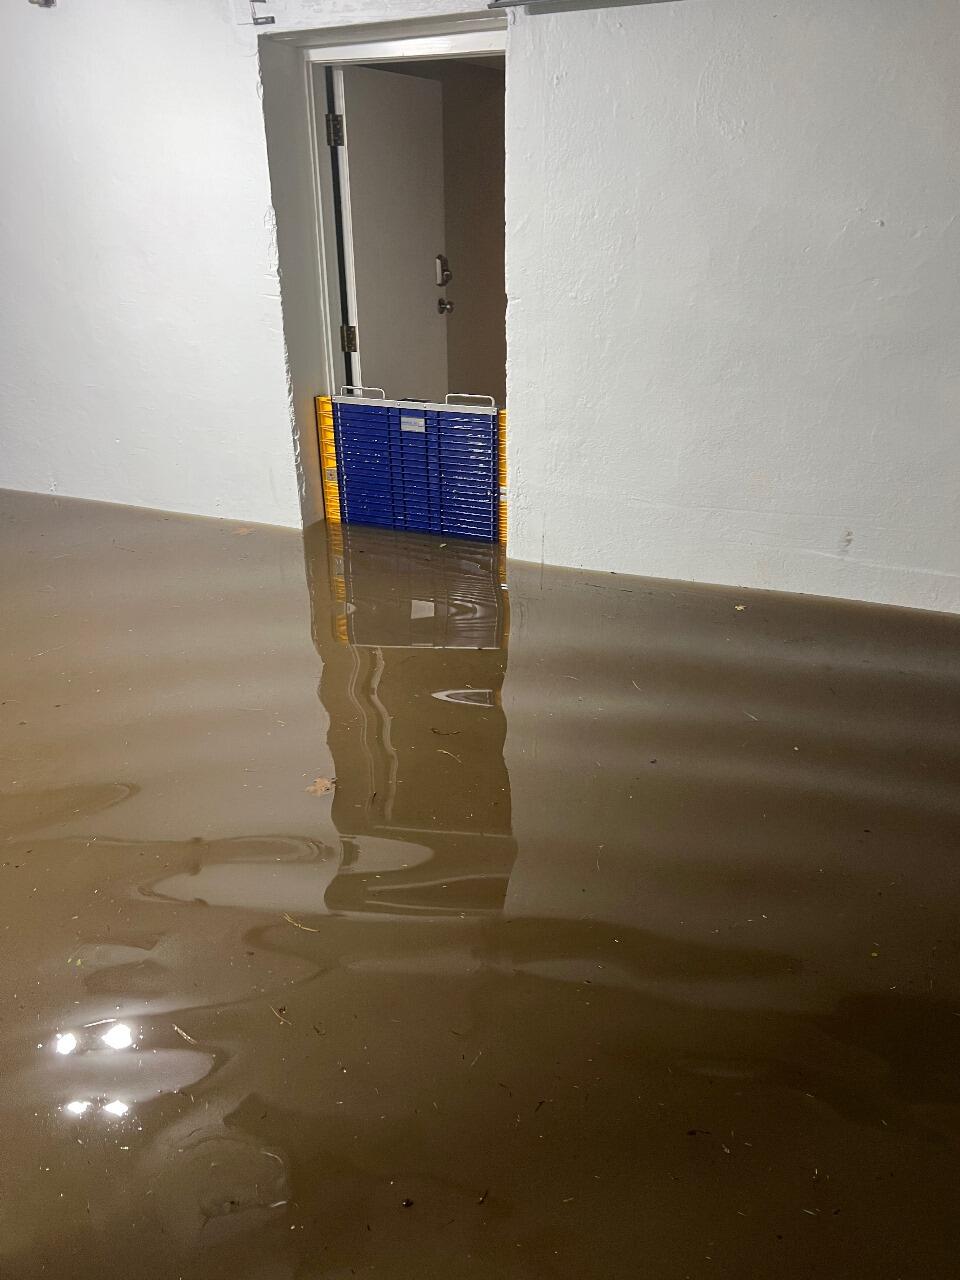
3. Inflating the Seal
With the barrier positioned and the side panels fully extended, your next task is to inflate the seal. The inflated seal creates a watertight barrier that prevents water from seeping through.
Start the Inflation Process:
Locate the Air Retention Switch: Begin by opening the air retention switch. This switch allows the barrier to retain air as you inflate the seal.
Inflate Using the Pump Handle: Use the pump handle provided with your flood barrier to start inflating the seal. Keep your eye on the air pressure gauge as you work. You’re aiming for a gauge reading of approximately 2 bar, which falls into the green region on the gauge. This is the optimal pressure for creating a durable seal.
Monitor the Pressure: As you inflate, carefully check the pressure gauge. Inflating too much or too little can lead to issues. The correct pressure ensures that the barrier is both firm and flexible, capable of expanding when needed while staying anchored in place.
Close the Switch: Once the correct pressure is reached, close the air retention switch. Keeping it in the horizontal position prevents accidental deflation, ensuring the barrier remains inflated and ready to perform during heavy rains.
Final Seal Check:
Press Down Firmly: After inflation, push down firmly on the barrier. This action is vital to ensure that the barrier is tight against the ground and that it forms a complete seal with the doorstep.
Perform a Quick Test: Finally, check one last time to ensure that the barrier has not shifted or raised from its position. A correctly installed barrier should remain firmly pressed to the ground without any gaps.
Inflating the seal properly seals the deal—literally! It’s the final step that transforms your barrier from a simple physical installation to a fully operational safeguard against floods.
Additional Tips for a Successful Installation
While the basic steps are straightforward, here are some extra tips and practical advice to ensure that you make the most out of your Dam Easy Flood Barrier:
Double-Check the Environment
Solid Reveals: Remember, the product instructions advise against installing the barrier within a door frame made of wood, aluminum, or other less solid materials. Instead, install only in solid reveals. This avoids any weak points where water might seep through.
Weather Considerations: If you’re installing the barrier ahead of a forecasted storm, plan for a quieter time when there’s no wind to make the process easier and safer.
Safety First
Wear Protective Gear: Gloves aren’t just for comfort; they’re an essential safety measure, especially near pinch points where the ratchet handle meets the barrier. It’s better to be safe than sorry.
Clear Instructions: If you’re ever in doubt during any part of the installation, refer to the video instructions via the QR code provided with the product. Visual aids can be incredibly helpful if you need extra clarification.
Troubleshooting Common Issues
Barrier Movement: If you notice any movement of the barrier once installed, double-check the extension of the side panels. The barrier should be firmly seated in the reveals with no wiggle room.
Seal Inflation Issues: Inadequate inflation can compromise the watertight seal. If the pressure gauge doesn’t reach the green region, or if you’re noticing that the barrier has lifted slightly from the doorstep, try reinflating the seal or readjusting the barrier’s position.
Interference with the Door: It’s crucial to ensure that the door closes properly after installation. The ‘Max’ extension mark is a safeguard here—if the door is not closing, you might need to readjust the side panels.
Easy Maintenance for Long-Term Performance
After installing your flood barrier, regular checks can help prolong its lifespan and effectiveness:
Routine Inspections: Examine your Dam Easy flood barrier after heavy rains or storms to ensure it hasn’t shifted. Look for any signs of wear on the seal or the side panels.
Quick Repairs: Dam Easy Flood Barriers are designed for simplicity. If you notice minor issues, most adjustments can be made quickly with the same steps used during initial installation.
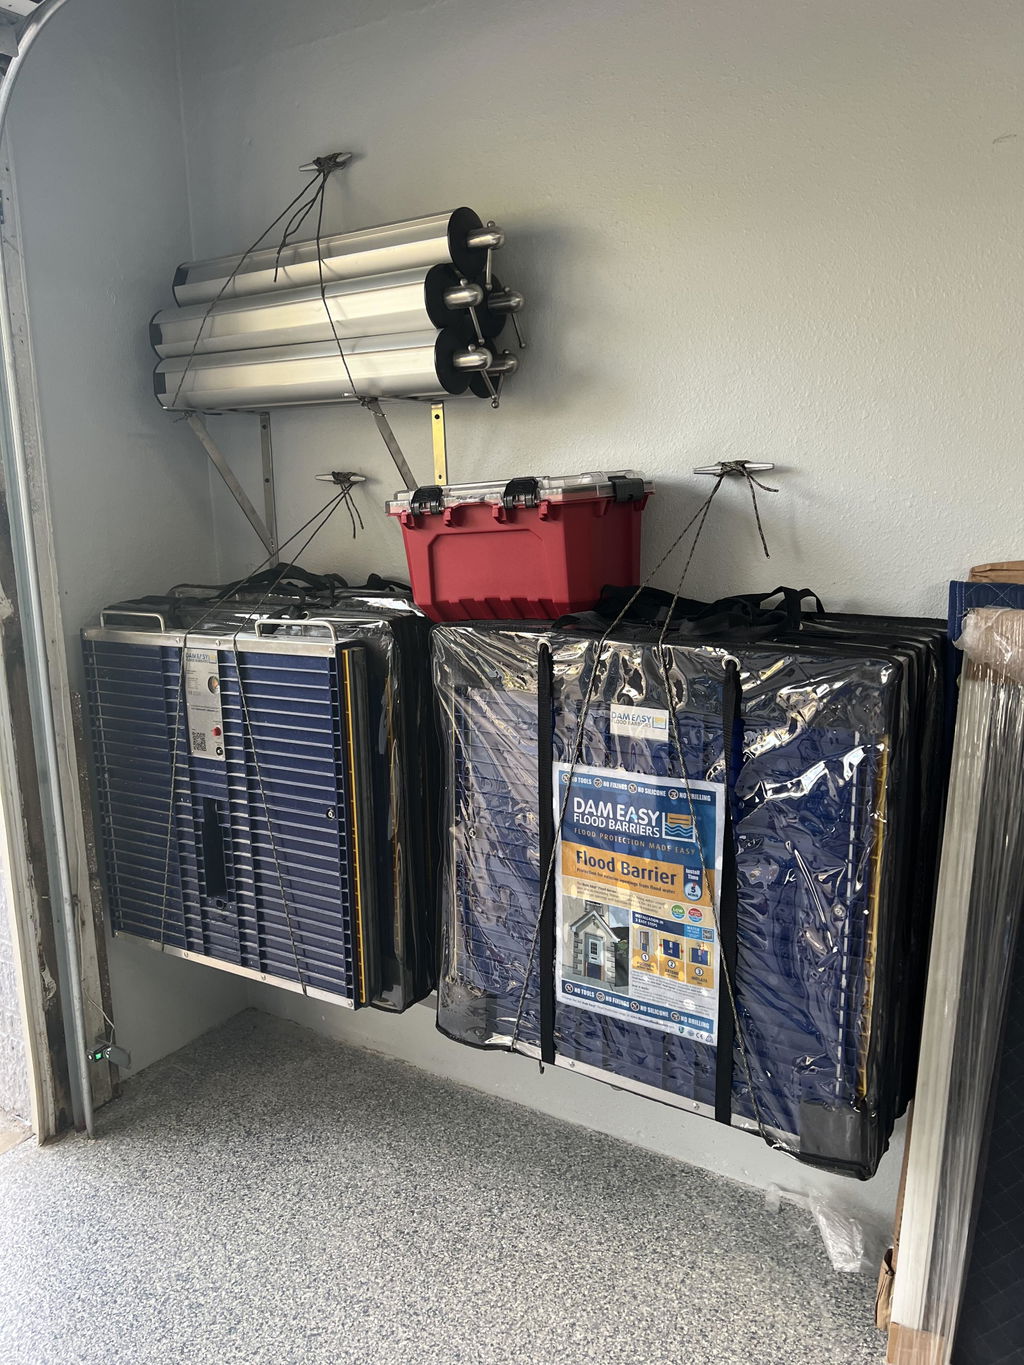
Optional Security Cover: For added security and peace of mind, consider the optional Dam Easy® Lockable Security Cover. This accessory helps prevent accidental deflation or unauthorized removal, keeping your barrier secure until it’s needed.
The Benefits of a DIY Installation
What makes Dam Easy Flood Barriers stand out is their simple installation process combined with significant long-term benefits. Here are a few reasons why taking on the installation yourself is a smart choice:
No Need for Specialized Skills: The entire process is designed to be manageable even if you have limited experience with home improvement projects. Clear instructions and common-sense steps mean you can confidently install the barrier on your own.
Save on Labor Costs: By avoiding the expense of hiring professionals, you reduce your overall costs. This means more money in your pocket for other important upgrades or savings.
Instant Flood Protection: Once installed, your property is immediately shielded from the threat of flood damage. This quick turnaround can be a lifesaver in unexpected weather conditions.
Empowerment and Confidence: There’s a unique satisfaction that comes from taking matters into your own hands. Knowing that you can install and maintain your own flood protection gives you peace of mind during extreme weather events.
Wrapping Up: Your Flood Protection Solution
Installing your Dam Easy Flood Barrier is not just about following a series of steps—it’s about investing in your property’s long-term safety and value. By carefully positioning the barrier, securely extending the side panels, and properly inflating the seal, you create a reliable defense against unwanted water intrusion.
Remember these key points:
Always start with a clean, stable installation area.
Use the ratchet handle to extend the side panels until you feel solid resistance.
Inflate the seal until the pressure gauge hits the safe zone, and ensure that the barrier remains firmly pressed against the ground.
Once you’ve completed the installation, take a few extra moments to review your work. Check that the door closes without any interference and that the barrier isn’t moving or lifting. These final checks are critical to guaranteeing that your flood protection is as effective as it can be.
When heavy rains or floods hit, you’ll have the peace of mind knowing that your property is defended by a barrier that’s not only designed for performance but also installed to perfection with your own hands. And with low-maintenance upkeep and the availability of additional security features (like the Dam Easy® Lockable Security Cover), you’re making a smart investment that will save you both money and headaches for years to come.
Flooding can be a stressful and unpredictable event. However, with Dam Easy Flood Barriers, you are in control. Whether you’re a homeowner or business owner in the USA or Australia, this guide is your roadmap to creating a lasting defense against the elements.
So, get your materials ready, put on those gloves, and follow these steps carefully. The process might feel like a few extra minutes of work now, but it’s a small price to pay compared to the potential damage and loss caused by unpreparedness. Every step you take today strengthens your home or business for tomorrow’s challenges.
Flood protection made simple, effective, and accessible—that’s the promise of Dam Easy Flood Barriers. Enjoy the peace of mind that comes with knowing you’ve taken the right steps to protect what matters most.
Happy installing!