When it comes to keeping your basement dry and protecting your home from water damage, a reliable sump pump is your best friend. But with so many options out there, how do you choose the right one for your needs? Don't worry; we've got you covered with this simple guide to help you make the right choice.
Understanding Sump Pumps
First things first, let's break down what it is and the different types you can choose from. A sump pump is a device installed in the lowest part of your basement or crawlspace. Its job is to pump out water that collects in a sump basin, preventing flooding and water damage.
There are two main types of this device:
- Submersible Sump Pumps: These are installed inside the sump pit and are submerged in water. They're usually quieter and take up less space in your basement.
- Pedestal Sump Pumps: These sit above the sump pit with the motor on a pedestal. They're easier to access for maintenance but can be noisier.

Factors to Consider
When choosing the right sump pump for your home, there are several factors to consider:
Pump Capacity
Pump capacity is measured in gallons per hour (GPH) or gallons per minute (GPM). You'll want a pump that can handle the amount of water your basement may need to deal with. Consider the size of your basement and the amount of rainfall your area typically gets. A higher GPH means the pump can move more water in a shorter amount of time.
Horsepower
these devices come in different horsepower (HP) ratings, usually ranging from 1/4 HP to 1 HP. The horsepower you need depends on the size of your sump pit and the amount of water you're dealing with. Generally, 1/3 HP is sufficient for most homes, but if you have a larger basement or live in an area with heavy rainfall, you might need a 1/2 HP or even a 1 HP pump.
Switch Types
Sump pumps use switches to turn on and off automatically. There are three main types:
- Vertical Switch: Best for narrow sump pits, as it only needs a vertical movement to activate.
- Tethered Float Switch: Floats on top of the water and is ideal for larger pits, providing more on/off cycles.
- Electronic Switch: Uses sensors to detect water levels and can be more reliable but also more expensive.
- Backup System
Power outages often occur during storms, the same time you need your sump pump the most. A backup system is crucial. You can opt for a battery backup one or a water-powered backup pump. Battery backups kick in when the power goes out, while water-powered backups use your home's water pressure to keep things dry.
Material and Durability
The material of the the device affects its durability. Cast iron pumps are more durable and dissipate heat better, but they're heavier and more expensive. Thermoplastic pumps are lighter and more affordable but may not last as long. Stainless steel is another durable option that's resistant to corrosion.
Warranty and Customer Support
A sump pump is an investment in your home's protection, so you'll want one that comes with a good warranty and reliable customer support. Look for pumps with at least a three-year warranty and check out reviews to see how the manufacturer handles customer service.
Top Brands to Choose From
Here are a few reputable sump pump brands to consider:
- Zoeller: Known for their durable, high-quality pumps.
- Wayne: Offers a range of reliable, easy-to-install pumps.
- Liberty Pumps: Popular for their innovative designs and solid performance.
- Basement Watchdog: Excellent for backup systems and flood prevention.
How to Install a Sump Pump
Installing a sump pump can be a DIY project, but it does require some basic plumbing and electrical skills. Here's a step-by-step guide to help you get the job done right.
You Will Need:
- Sump pump
- Sump basin (if not already installed)
- PVC pipes and fittings
- Check valve
- Gravel
- Cement
- Drill with hole saw bit
- Wrench
- Teflon tape
- PVC glue and primer
- Level
- Shovel
- Tape measure
- Pipe cutter
- Extension cord (if necessary)
Step-by-Step Installation
- Choose the Location
- Find the lowest point in your basement where water collects.
- Ensure there's an electrical outlet nearby or plan to install one.
- Dig the Sump Pit
- Dig a hole that’s 10 inches deeper and about 20 inches wider than the sump basin.
- Line the bottom of the hole with 3 inches of gravel for proper drainage.
- Install the Sump Basin
- Place the sump basin in the hole, making sure the top is level with the basement floor.
- Fill around the basin with gravel up to the top of the basin, but not inside.
- Prepare the Discharge Pipe
- Drill a hole in the exterior wall of your home for the discharge pipe if one isn't already there.
- Attach a 1 1/4-inch or 1 1/2-inch PVC pipe to the sump pump’s discharge port. Use Teflon tape to ensure a tight seal.
- Install the Check Valve
- Cut the PVC discharge pipe above the sump pump and install a check valve to prevent water from flowing back into the pump.
- Make sure the valve’s arrow points away from the pump.
- Position the Sump Pump
- Place the sump pump into the basin on a stable surface like a brick or a piece of stone to keep it off the bottom.
- Ensure the float switch (if using a pump with a float) moves freely.
- Connect the Discharge Pipe
- Run the PVC pipe from the pump, through the hole in the wall, and outside your home.
- Use PVC glue and primer to secure the pipe connections.
- Seal the Pit
- Mix and pour concrete around the top edge of the basin to seal it in place.
- Smooth the surface and let it dry.
- Test the Pump
- Plug the sump pump into the electrical outlet.
- Pour water into the basin to make sure the pump turns on and discharges water properly.
- Finish Up
- Ensure all pipes are securely fastened and check for leaks.
- Make sure the discharge pipe extends far enough from your home to prevent water from re-entering the basement.
Additional Tips
- Safety First: Always ensure the electrical connection is safe and dry. If you're not comfortable working with electricity, hire a professional.
- Regular Maintenance: Test your sump pump regularly, especially before the rainy season, to ensure it's working correctly.
- Battery Backup: Consider installing a battery backup system to keep your pump running during power outages.
By following these steps, you can successfully install a sump pump and protect your basement from flooding. While installing a sump pump can be a DIY project, it's often best to hire a professional to ensure everything is set up correctly. Good luck with your installation!
Looking for Hassle-Free Flood Control? Check out Flood Barriers!
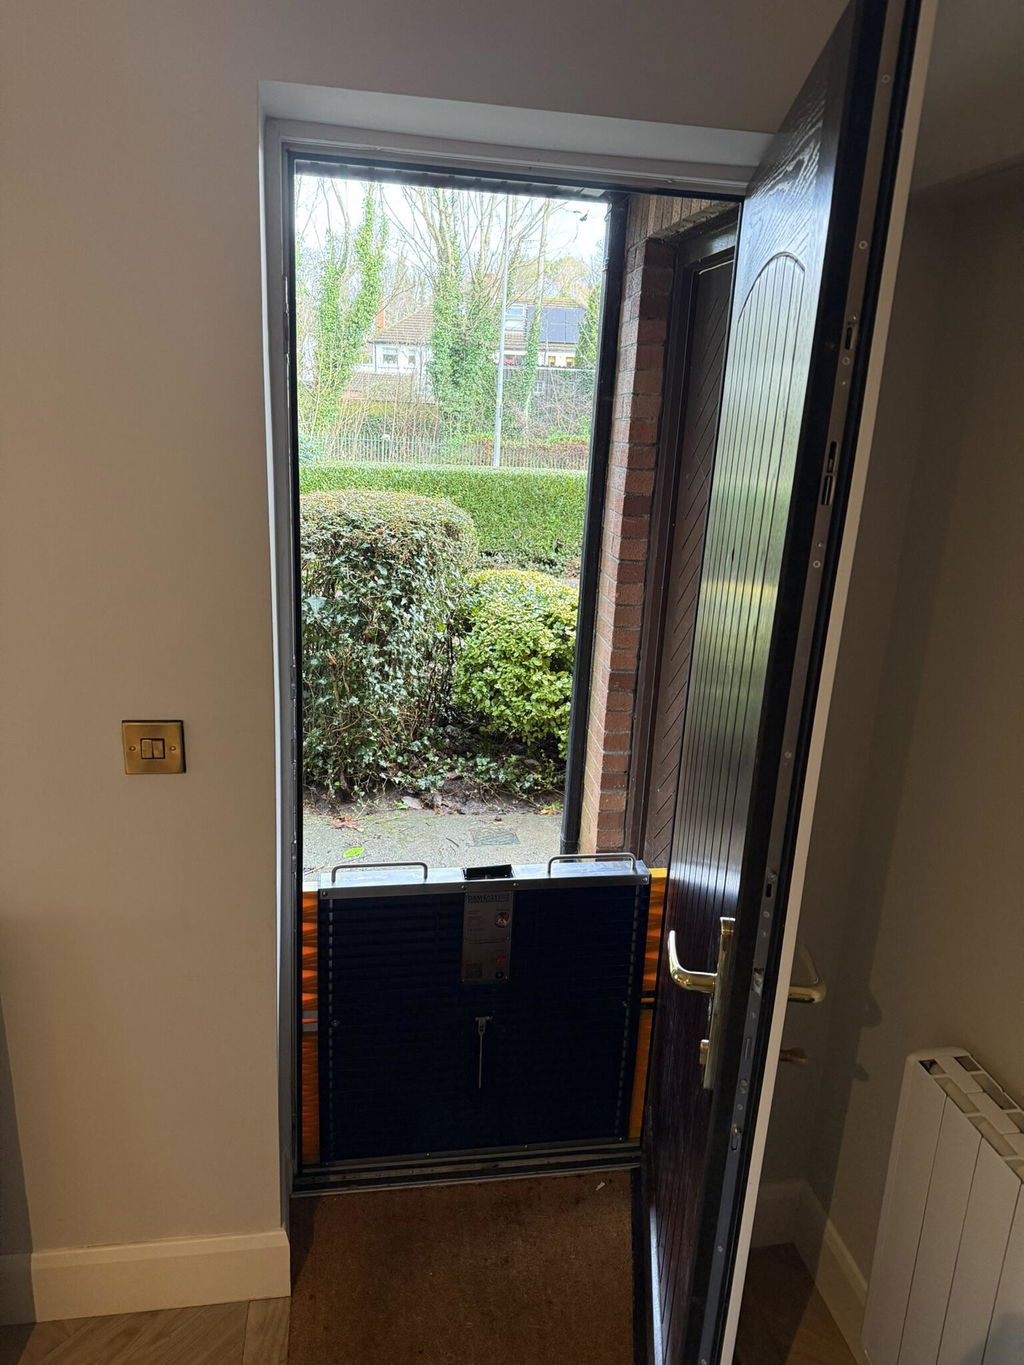
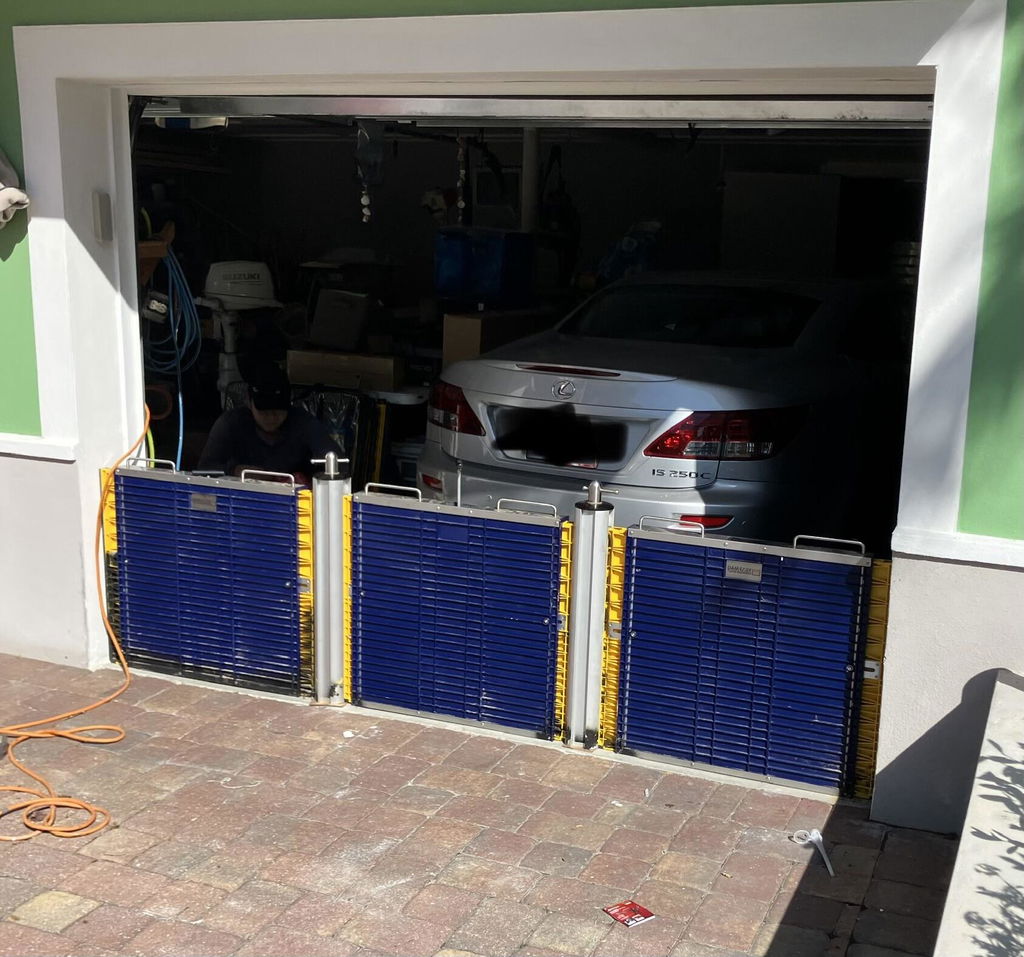
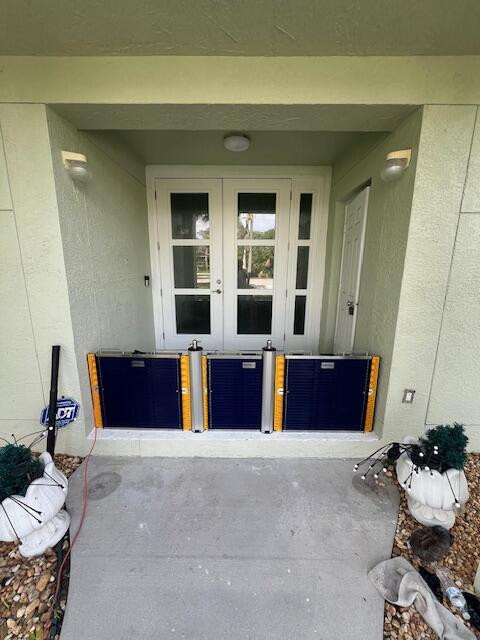
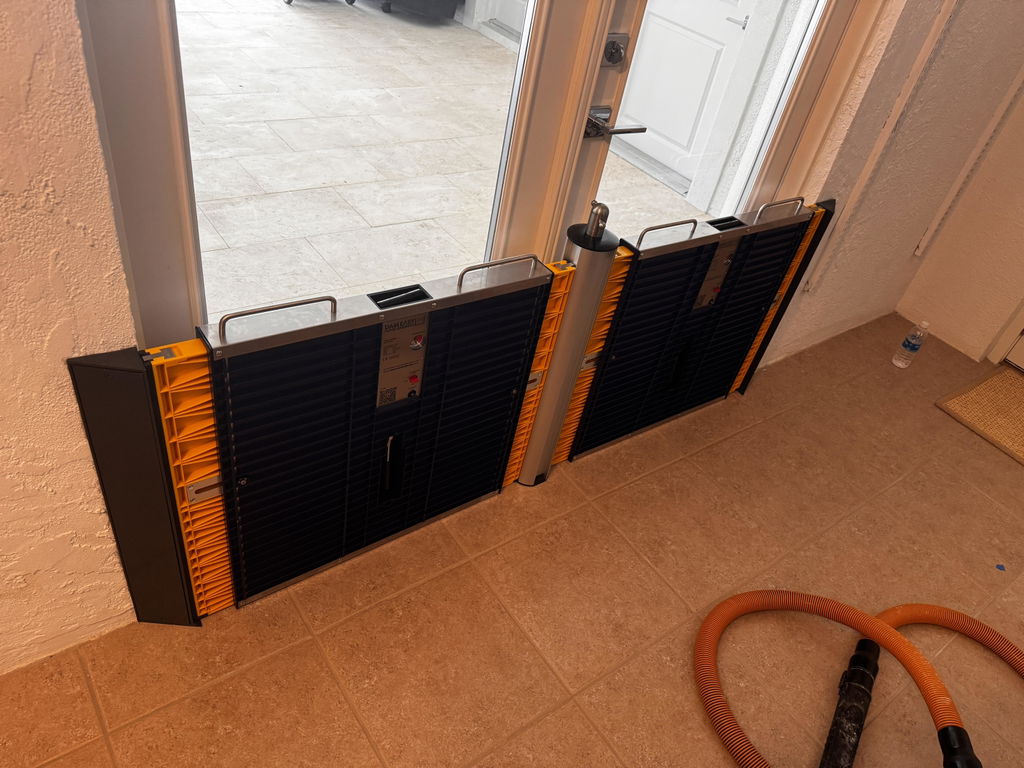
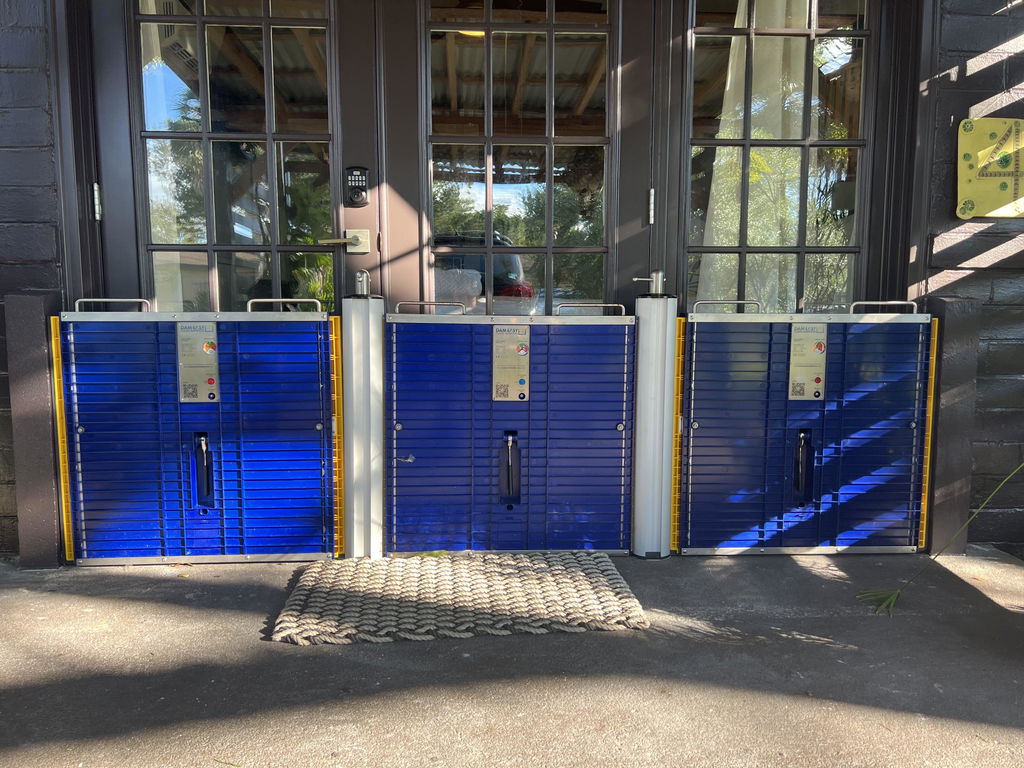
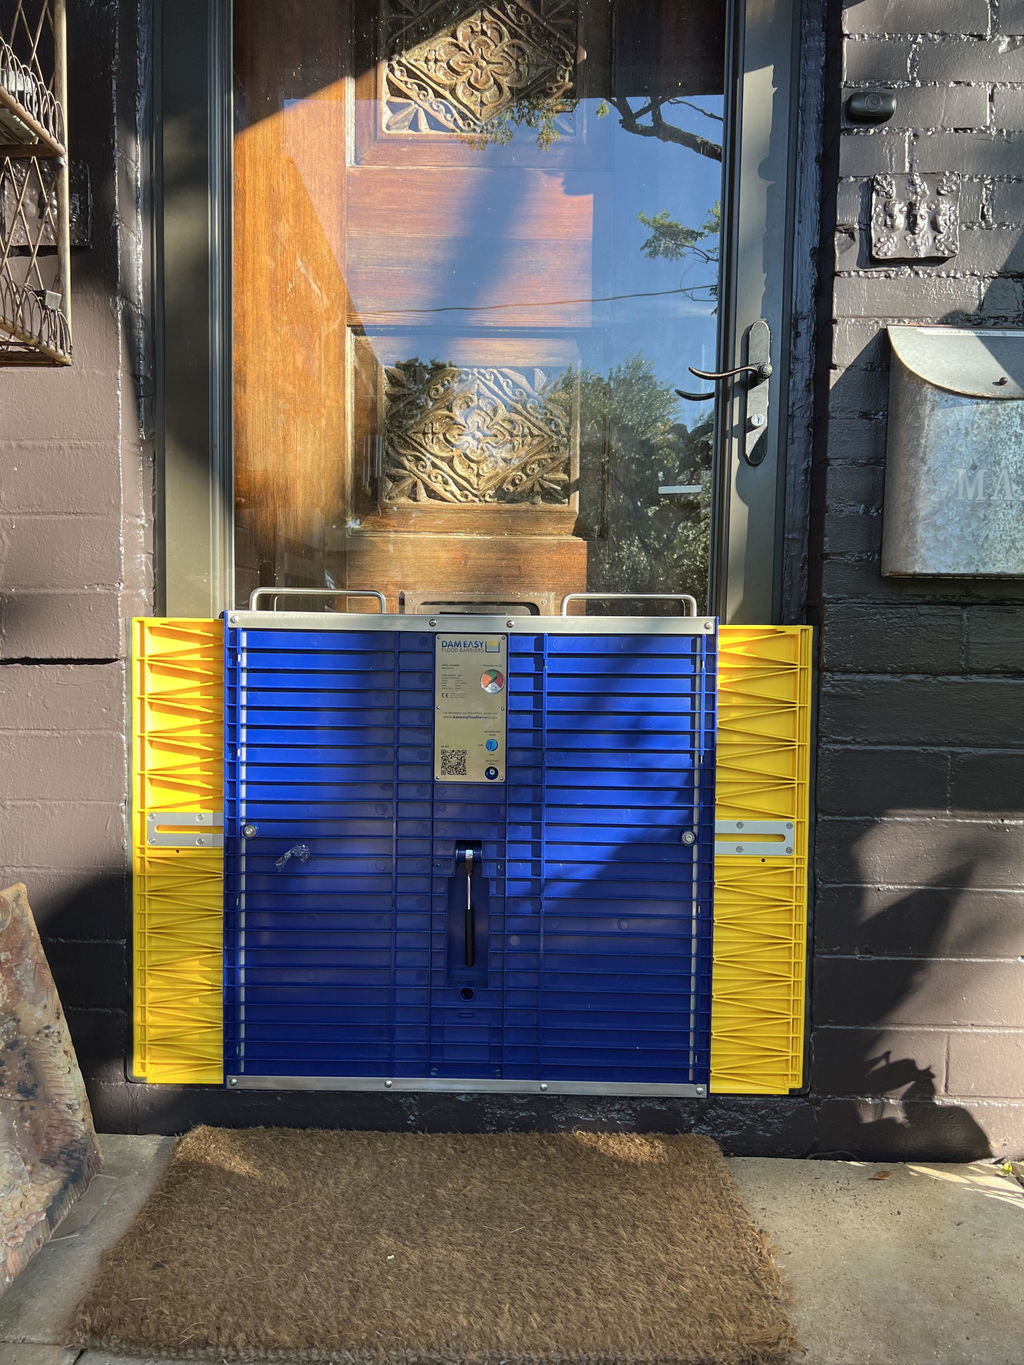
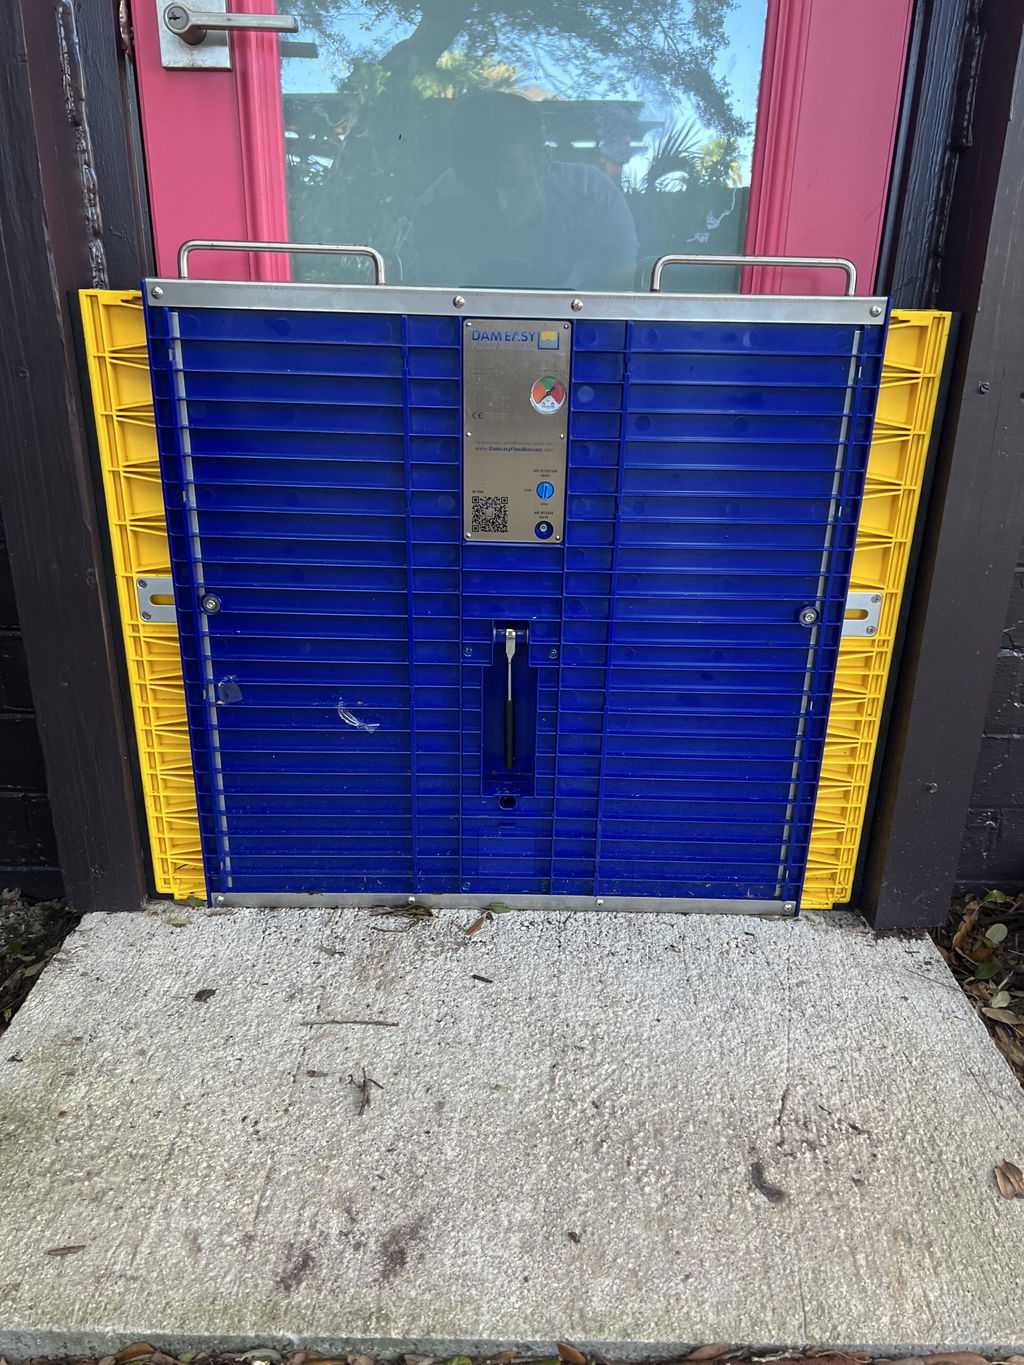
When it comes to flood protection, convenience and efficiency are key. If you're looking for a solution that's quick to set up and doesn't require any special tools or skills, Dam Easy flood barriers might be just what you need. Here's why they are a great option for homeowners:
Why Choose Dam Easy Flood Barriers?
- Quick Installation
- Dam Easy flood barriers can be installed in just a few minutes. No need to spend hours setting up complex systems when you can have reliable flood protection in a fraction of the time.
- No Special Tools Required
- These barriers are designed to be user-friendly, meaning you don't need any special tools, skills, or physical force to install them. Simply place them in the desired location, and you're good to go.
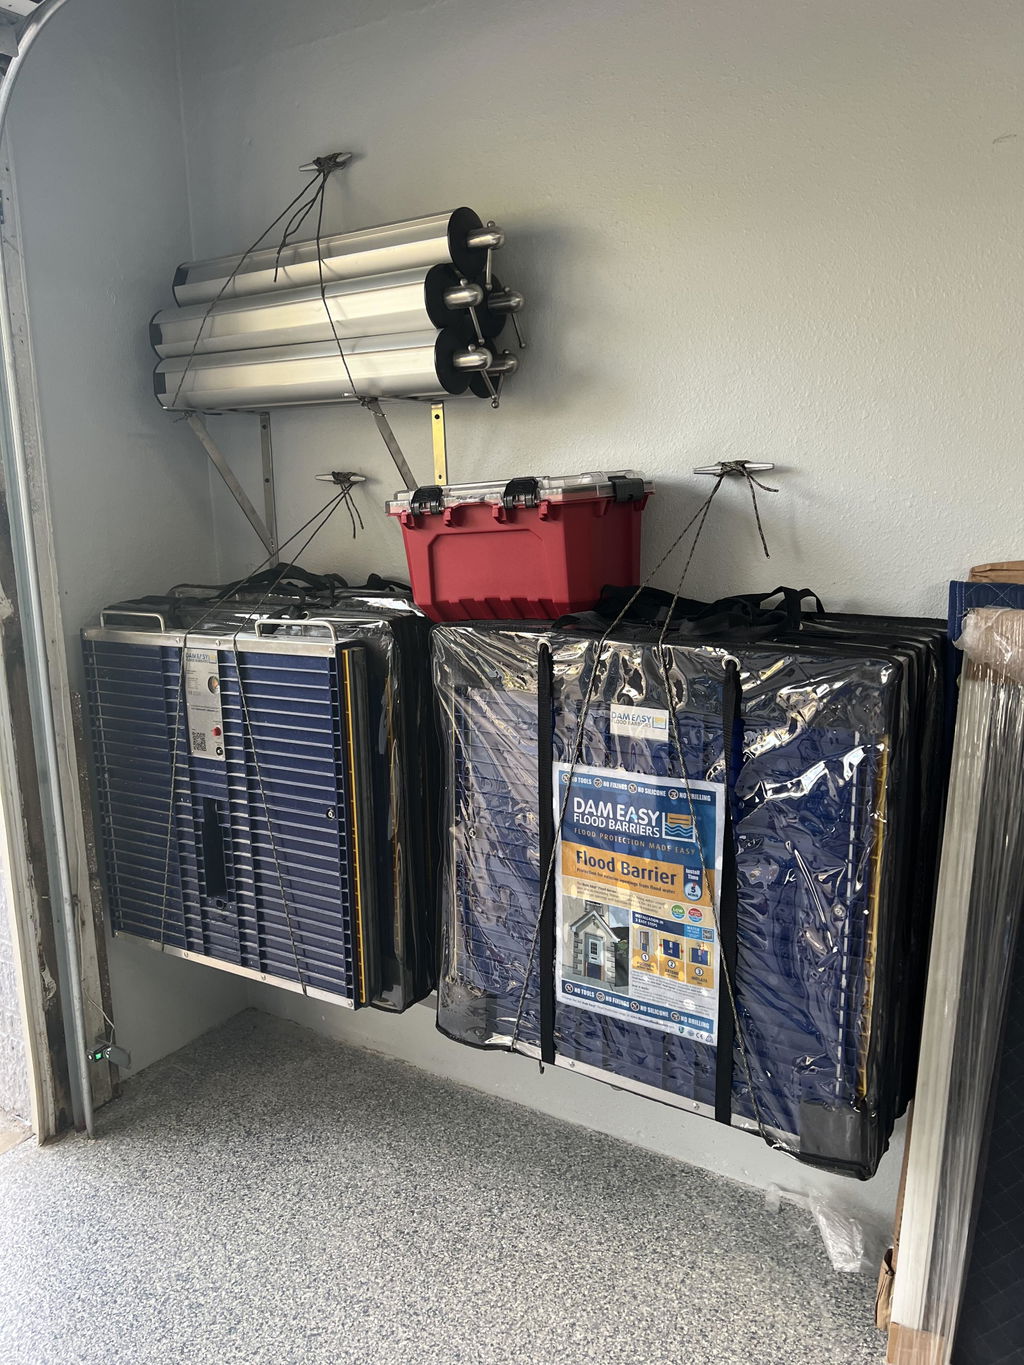
- Reusable
- Unlike some flood protection solutions that can only be used once, Dam Easy barriers are built to be used multiple times. This makes them a cost-effective and environmentally friendly choice for long-term flood protection.
- Versatile and Adjustable
- Dam Easy flood barriers can be adjusted to fit various door and window sizes. This flexibility ensures that they provide a tight seal and effective protection against flooding in different areas of your home.
- Easy Removal and Storage
- Once the flood threat has passed, removing Dam Easy barriers is just as simple as installing them. They can be easily taken down and stored away until they're needed again, taking up minimal space in your home.
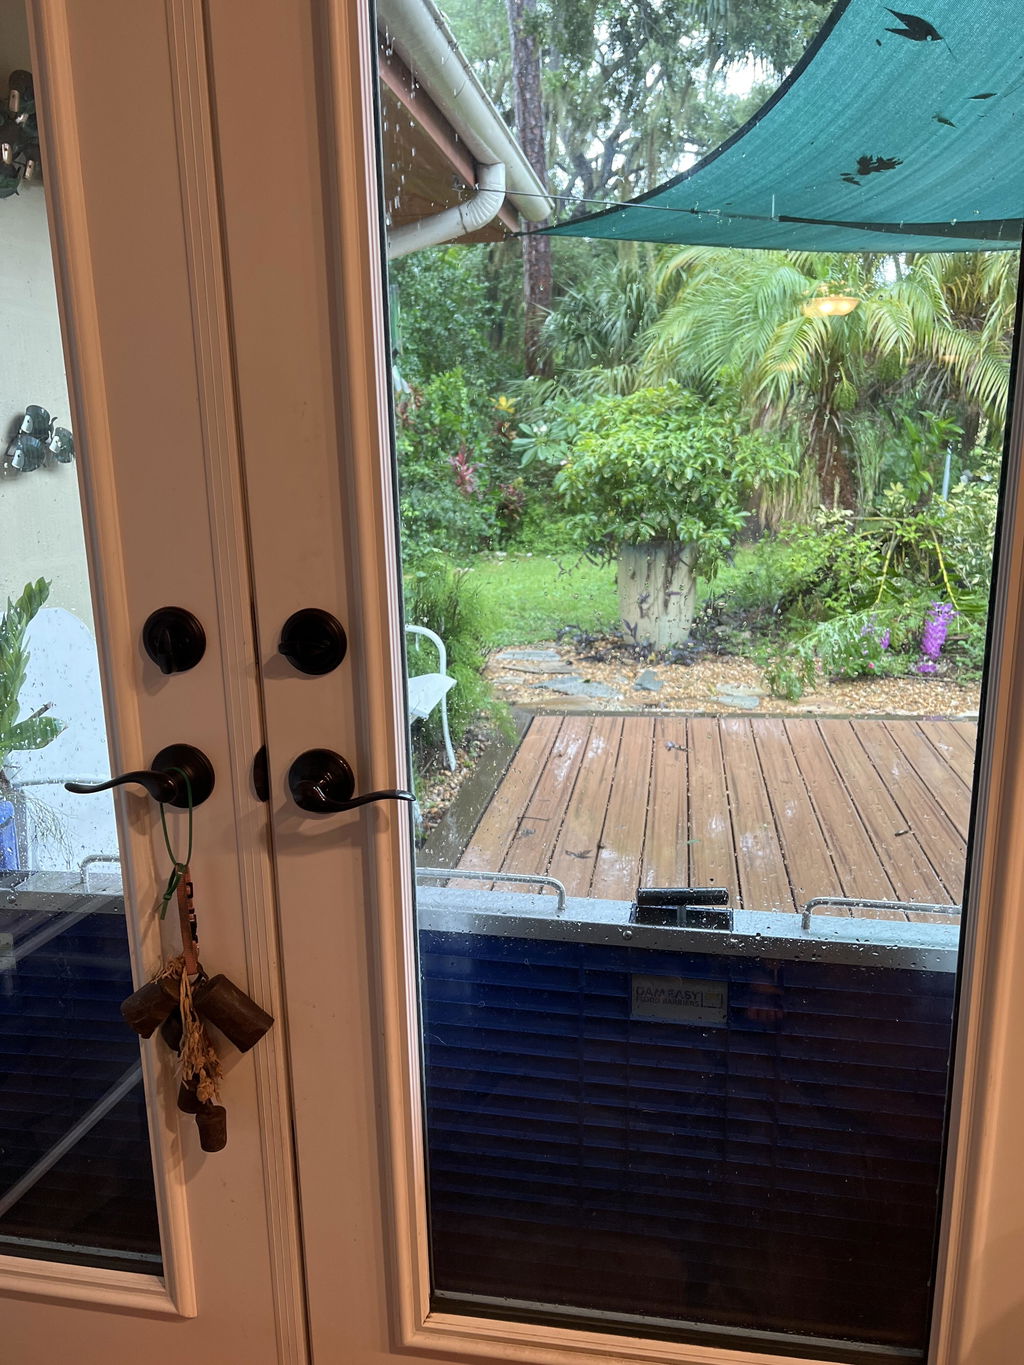
How to Use Dam Easy Flood Barriers
- Position the Barrier
- Place the barrier in front of the door or window you want to protect. Ensure that the area is clean and free of debris for a secure fit.
- Extend the Barrier
- Use the built-in mechanism to extend the barrier until it fits snugly against the sides of the door or window frame. This creates a watertight seal that prevents water from entering.
- Check the Seal
- Make sure the barrier is firmly in place and that there are no gaps. Adjust as necessary to ensure maximum protection.
- Relax
- With the Dam Easy barrier installed, you can relax knowing that your home is protected from potential flooding.
- Remove and Store
- Once the risk of flooding has passed, simply retract the barrier, remove it, and store it in a dry place for future use.
Ultimate Flood Barrier

$949.00
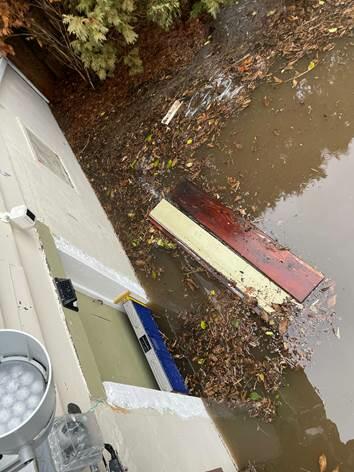
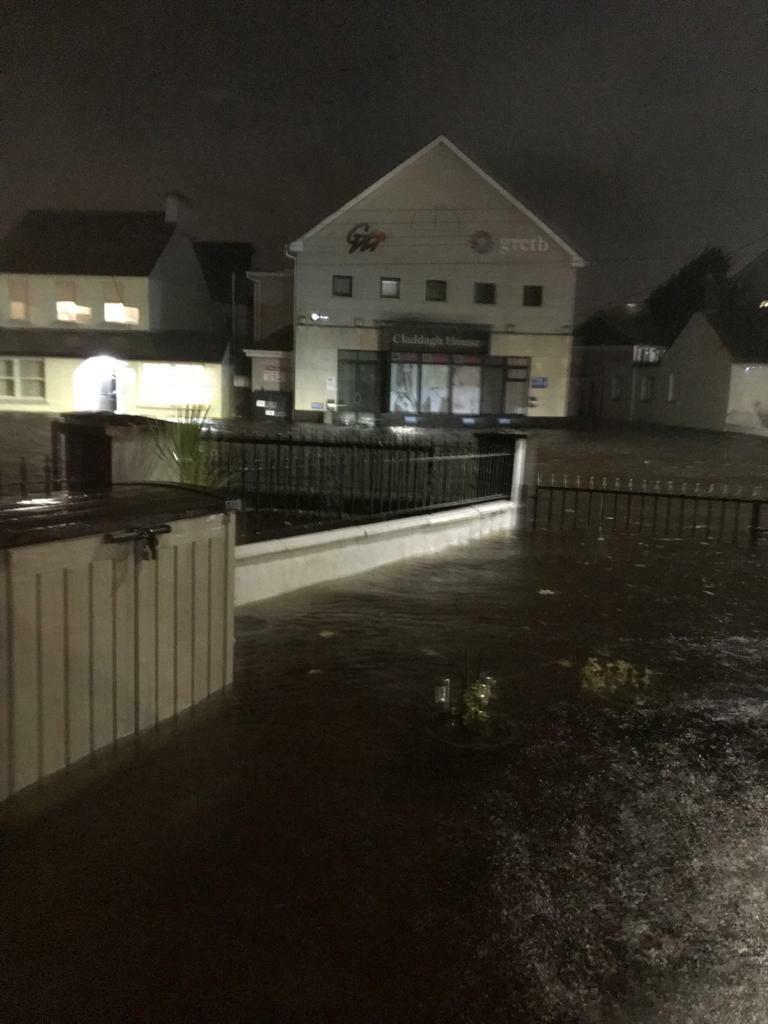
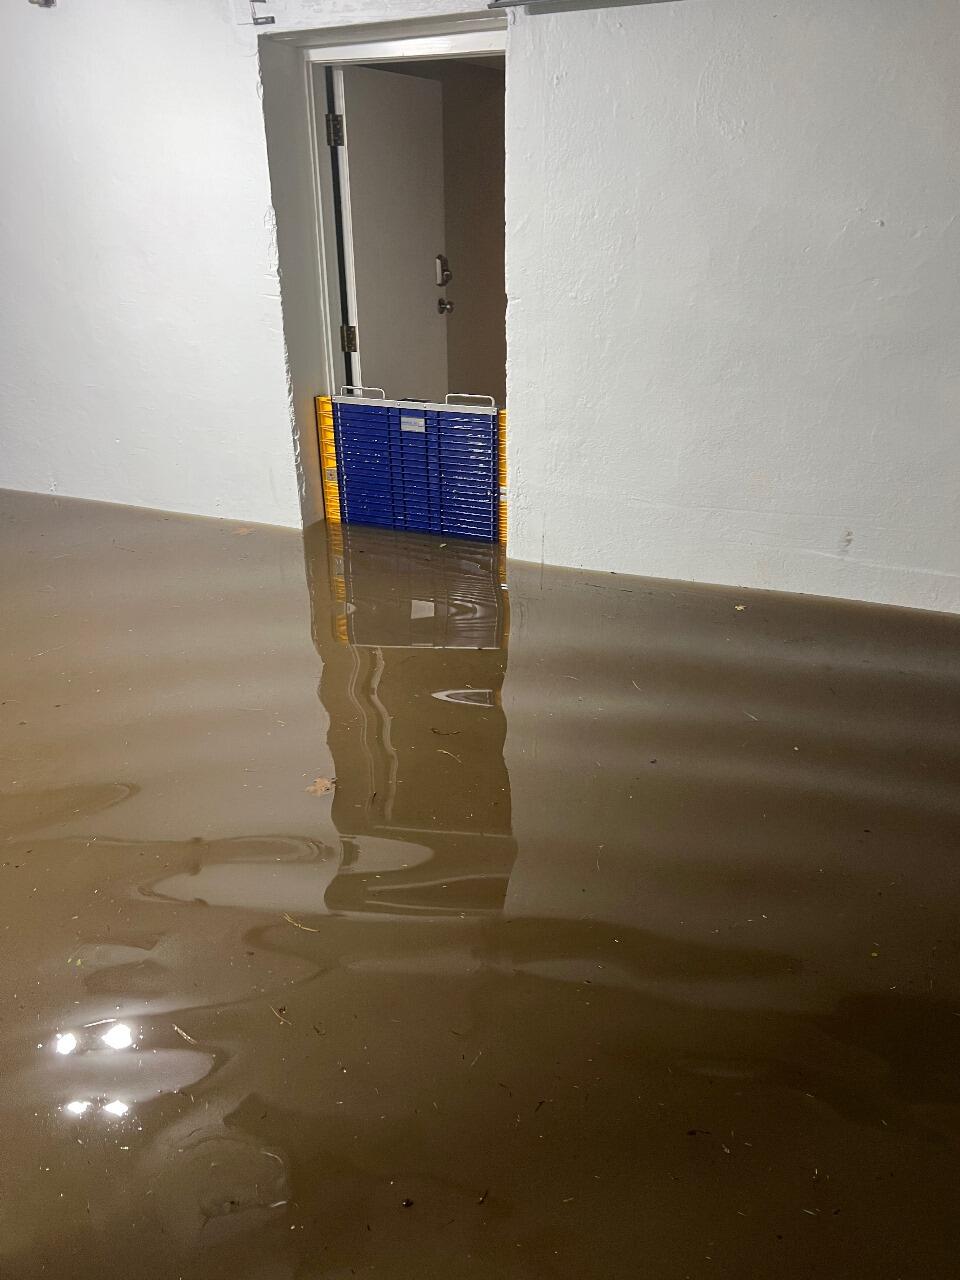
Floods are becoming more common around the world. What was once a 100-year phenomenon is now a seasonal trend that homeowners must deal with. That’s EXACTLY why you need this Dam Easy Ultimate Flood Barrier! An excellent alternative to heavy… Read More
Conclusion
Dam Easy flood barriers offer a hassle-free, reliable solution for homeowners looking to protect their property from flood damage. With their quick installation, ease of use, and reusability, they provide an excellent alternative or complement to traditional sump pumps and other flood control measures.
Whether you're dealing with heavy rain, rising river levels, or just want to be prepared for the unexpected, Dam Easy flood barriers are a smart investment in your home's safety.